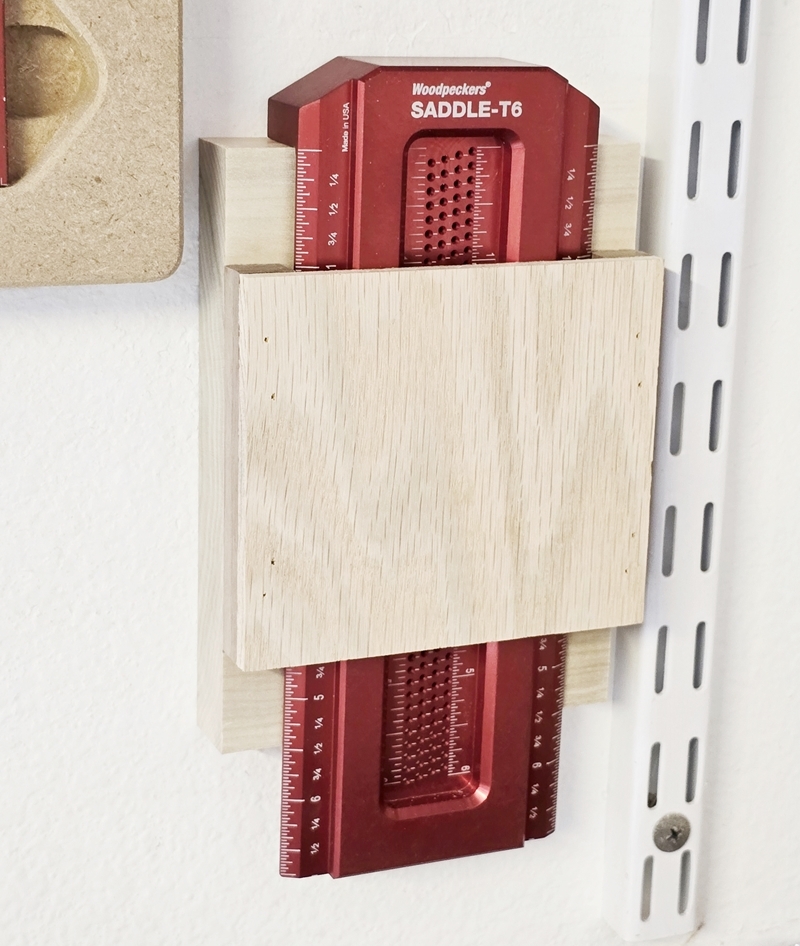
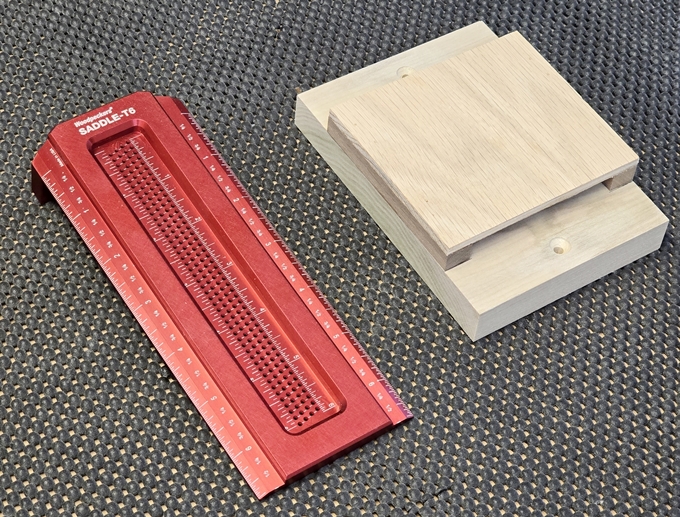
The Holster was designed to hold a Woodpeckers® Saddle-T6 saddle square, but it can hold any member of their set of saddle squares. It measures 5 1/2" high x 4" wide. It's a design that can be adapted for use with any similar tool type.
The Holster's simple design and small size might make it possible for you to build it from scrap that you can find in your woodshop.
I chose not to apply any finish to this project because it's intended for use in the shop.
Here's How It's Built
Unlike most of the other woodworking projects on this site, this project has no downloadable instructions. Instead, all the information you will need is provided here.
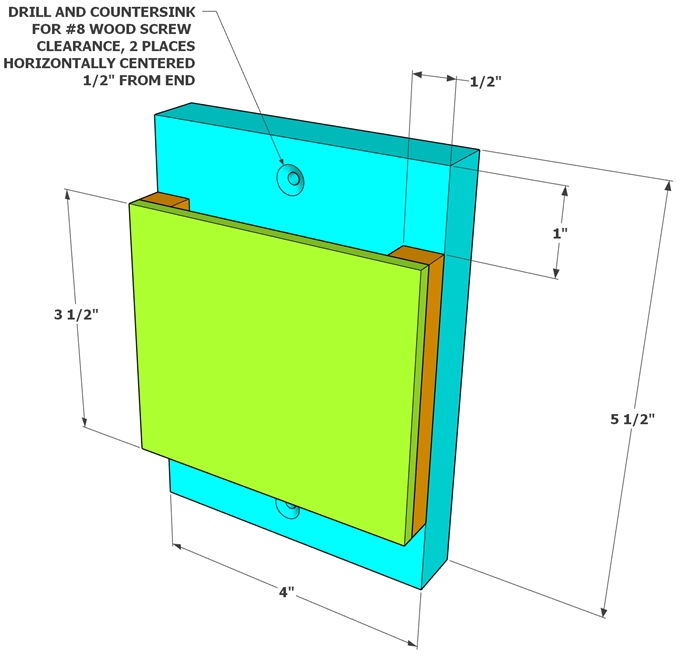
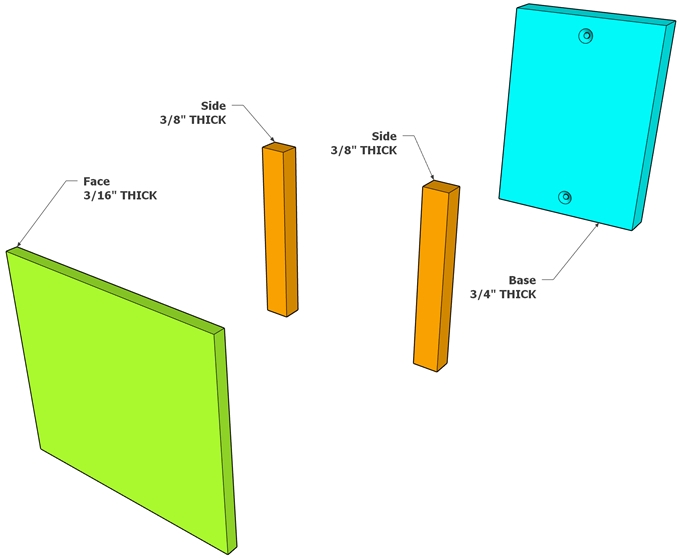
The space between the sides was designed to be 1/8" wider than the body of the square. The thickness of each side was designed to be 1/16" greater than the thickness of the body of the square. The 3/4" thickness of the Base was chosen because the lip of the square is 3/4" deep. The height of the Base was arbitrary. The positions of the Face and two Sides were offset 1" from the top of the Base so that you can use your thumb in the depression of the square's body to lift the square from the Holster.
Assemble the Project
Only glue and pin nails were used to assemble the project. Pin nails are not needed if you are prepared to hold the glued surfaces in place until the glue cures.
- Begin by spreading glue uniformly on only one side of each Side
- Lay the non-glued sides of the two Sides on a flat piece of wood. NOTE: 5/8" pin nails will pass through the total thickness of the Face and Side and will penetrate into the flat piece of wood. Be sure that the backing is something that you can afford to have damaged.
- Position the Face on top of the glued surfaces of both Sides
- Carefully align the ends and edge of each Side flush with the top, bottom, and outside edge of the Face
- Firmly hold the Face down on the Sides without disturbing their alignment
- Drive two 5/8" pin nails through the Face and into each Side
- File or grind the excess nail length flush with the back of each Side
- Mark a line 1" from the top of the Base
- Place the Base on a flat surface
- Spread glue uniformly on the Sides
- Place the Face and Side assembly on the Base such that the Sides are flush with the edges of the Base and one end of the assembly is flush with the line that you marked in Step 8
- Firmly hold the Face and Side assembly down on the Base without disturbing their alignment
- Drive two 1" pin nails through the Face and into each Side
I chose #8 x 1 1/4" flat head wood screws to mount the Holster to a wall. Drive the screws into a stud or other solid backing, if possible.