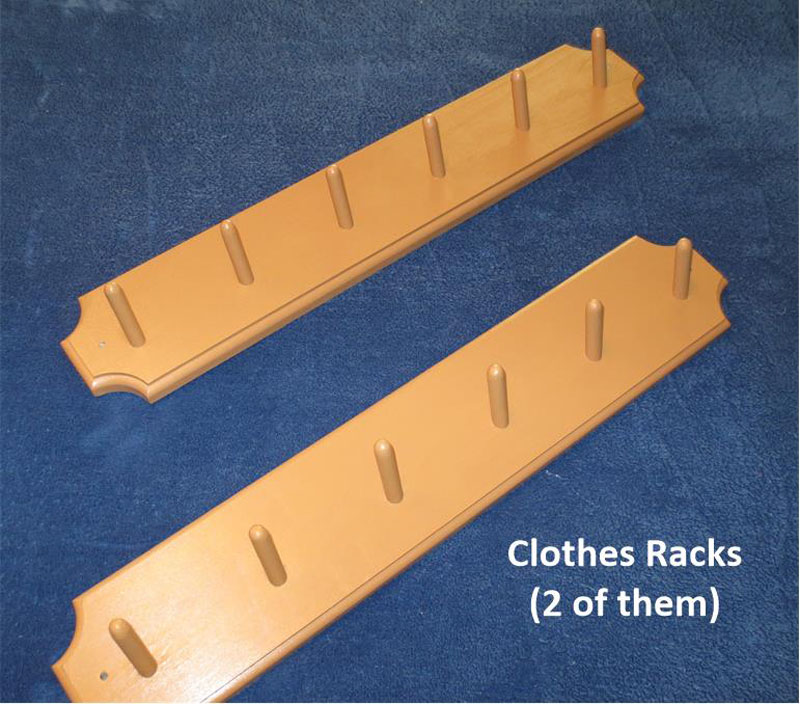
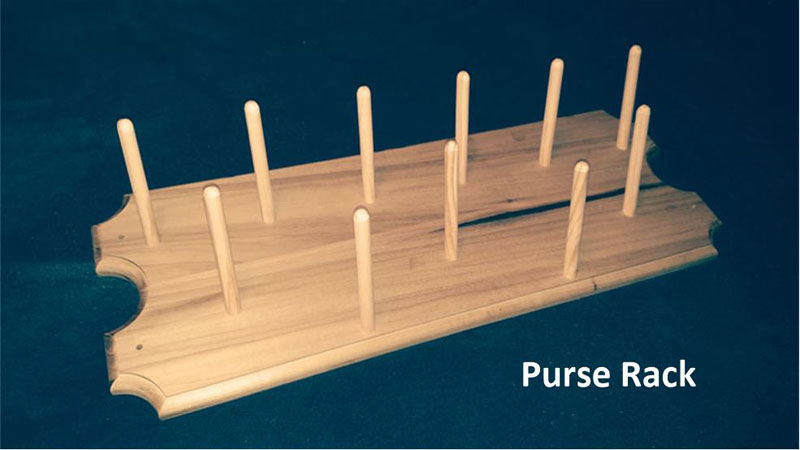
The Clothes Rack (2 of them) in the top picture and the Purse Rack in the bottom picture are obviously very similar. The Clothes Rack has a single row of six 2" Pegs, as measured perpendicularly from the front surface of the Base. The Purse Rack has three rows of 4" Pegs for a total of eleven. The height of these Pegs is also measured perpendicularly from the front surface of the Base.
The Pegs on the Purse Rack are Longer
The longer Pegs are needed on the Purse Rack because purses tend to be bulky. So they tend to angle out farther from the wall when they're hung close together, as they would be on the Purse Rack, The longer Pegs help to compensate for the lateral forces on the hanging purses.
Some Additional Details
The Base of the Clothes Rack is 3/4" solid poplar measuring 24" x 4 1/2". The Base of the Purse Rack is simply two boards of the same size joined side by side, so it's 9" wide. The edges of both Racks are routed with a 3/8" round-over and a 1/8" step. Some 3/16" diameter holes at each end make for simple mounting of the Racks using just a screw in each hole.
Angling the Pegs Upward
Each of the Pegs in both styles of the Rack is angled upward at 25°, so anything hanging from a Peg tends not to slide off.
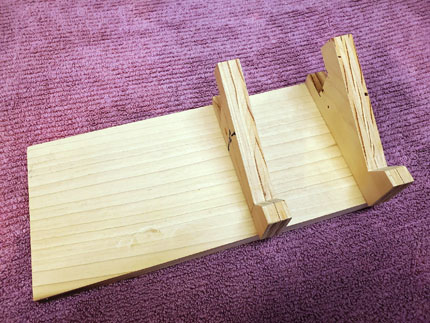
Drilling the 25° holes is facilitated by using a jig on a drill press. A drill press is necessary here. This is not the time to attempt to drill freehand.
Here's an example of a jig that will enable you to drill the holes at the desired angle:
Jig for Drilling Angled Holes
This jig is designed to be placed on a drill press table. The large area at the left provides ample room for clamping the jig to the table.
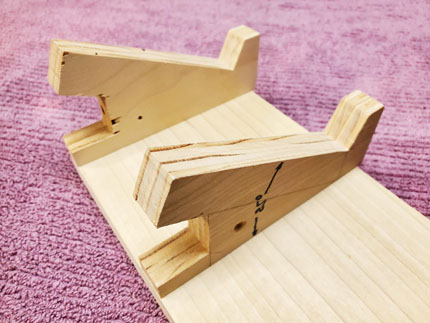
A Closer Look
The cut-out at the back of each ramp provides a place to clamp the Base to the jig to prevent any movement of the Base during drilling. You can see in the notation on one of the ramps that the angle is set at 25°.
Download Free Plans, Pictures, and Instructions
There are two ZIP files available for download.
The first ZIP file contains the Instruction file "INSTRUCTIONS_Clothes_Rack.pdf", pictures, SketchUp design file "One_Row_Clothes_Rack_03_SKETCHUP_VERSION_8.skp", and PDF design file "One_Row_Clothes_Rack_03_SKETCHUP_VERSION_8.pdf". The PDF file contains all the drawings and dimensional information that are in the SKP file for those who don't use SketchUp.
Click Here for the Downloadable ZIP file (1.16MB): Clothes_Rack.zip
The second ZIP file contains the Instruction file "INSTRUCTIONS_Purse_Rack.pdf", pictures, SketchUp design file "Purse_Rack_05_SKETCHUP_VERSION_8.skp", and PDF design file "Purse_Rack_05_SKETCHUP_VERSION_8.pdf". The PDF file contains all the drawings and dimensional information that are in the SKP file for those who don't use SketchUp.: